Using Kanzi Engine plugins
Kanzi Engine plugins extend the functionality of Kanzi Engine. Kanzi Engine executes these plugins on target platforms. Use a Kanzi Engine plugin to:
- Create custom nodes using the Kanzi Engine API, use them in your Kanzi Studio projects, and see in the Kanzi Studio Preview how they work.
- Create custom property types and messages using the Kanzi Engine API, and use them in your Kanzi Studio projects.
- Define the data entry points to your Kanzi application, and form the contract between the Kanzi application designer and developer.
To learn how you can use Kanzi Engine plugins, see:
Adding Kanzi Engine plugins to a Kanzi Studio project
To add a Kanzi Engine plugin to a Kanzi Studio project:
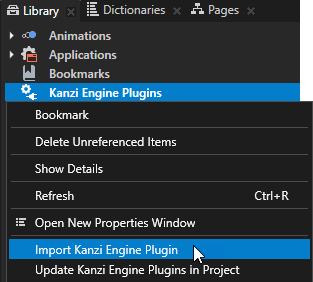
- In the Library right-click Kanzi Engine Plugins and select Import Kanzi Engine Plugin.

- Select the DLL file of the plugin you want to import and click Open.
When you select in the Library > Kanzi Engine Plugins the plugin you imported, in the Properties you can see a list of the content that the plugin brings to the Kanzi Studio project. For example, in the Properties you can see a list of property types, component, data source, render pass, node component, and trigger action types provided by the selected plugin.
-
Make sure that the solution configuration you use in Visual Studio to build your application and plugin projects matches the settings of your Kanzi Studio project.
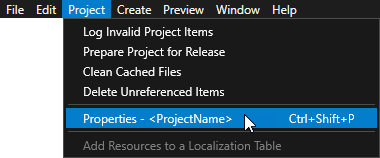
For example, if you use the GL_vs2015_Release solution configuration in Visual Studio, in your Kanzi Studio project in the > set:
- Preview OpenGL ES Wrapper to GL (Emulation through desktop OpenGL)
- Preview Build Configuration to Release
- Preview Visual Studio Version to 2015
- Preview Working Directory to ..\Application\bin.
With these settings set the Kanzi Studio Preview to work with the plugin.


- In the Library > Kanzi Engine Plugins select the plugin and in the Properties make sure that the Is Enabled property is enabled.

TIPUse the Is Enabled property to enable or disable any Kanzi Engine plugin in your project.
- Restart the Preview by pressing Ctrl F8, or by selecting > Restart Preview.
You can now use the content provided by the plugin in your Kanzi Studio project.
Updating Kanzi Engine plugins in a project
When you want to use a new version of a Kanzi Engine plugin that you use in a Kanzi Studio project, you must update that Kanzi Engine plugin in your Kanzi Studio project.
To update Kanzi Engine plugins in a Kanzi Studio project:
- Copy the .dll files of the plugins to the same location where the previous versions of the plugins are located.

- Update Kanzi Engine plugins in one of these ways:
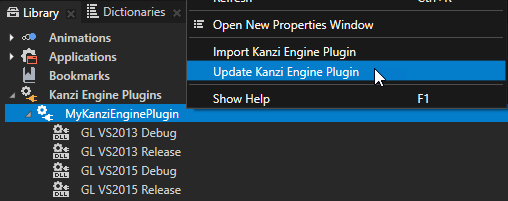
- To update a specific Kanzi Engine plugin, in the Library > Kanzi Engine Plugins right-click the plugin and select Update Kanzi Engine Plugin.
When Kanzi Studio loads the new version of the plugin, it shows the changes in the properties and classes defined in the plugin.

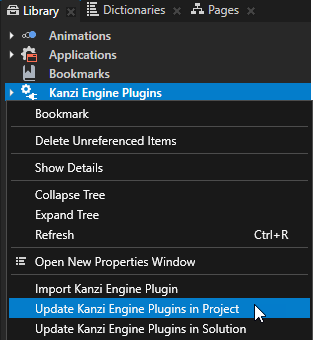
- To update all plugins in a project or solution, in the Library right-click Kanzi Engine Plugins and select either:
- Update Kanzi Engine Plugins in Project to update the plugins in the Kanzi Studio project
- Update Kanzi Engine Plugins in Solution to update the plugins in the Kanzi Studio project and referenced projects
When Kanzi Studio loads the new versions of the plugins, it prints to the Log window the changes in the properties and classes defined in the plugins.

- To update Kanzi Engine plugins using a script, see Updating a Kanzi Engine plugin using a script and Updating all Kanzi Engine plugins in a project or solution using a script.
Removing Kanzi Engine plugins from a project
When you remove a Kanzi Engine plugin from a Kanzi Studio project, Kanzi Studio removes the reference to the Kanzi Engine plugin, but does not delete the dll file of the Kanzi Engine plugin you removed.
To remove a Kanzi Engine plugin from a Kanzi Studio project in the Library > Kanzi Engine Plugins right-click the plugin you want to remove and select Delete.
See also
Creating Kanzi Engine plugins
Kanzi Engine plugins
Importing and updating Kanzi Engine plugins using a script

Open topic with navigation


